ervine
SRC Member-
Posts
3,334 -
Joined
-
Last visited
Content Type
Profiles
Forums
Gallery
Everything posted by ervine
-
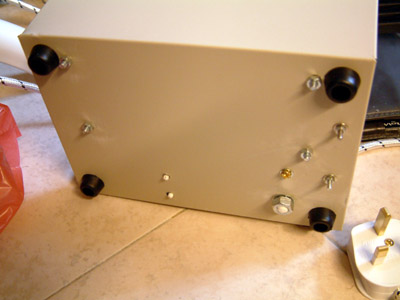
Here's a pic of the underside of the thing.. I hope that's what you meant.. sorry no pic of the MH on tank yet because there is no tank yet... nor is there a bulb yet... (still unhappy about this... grumble)
-
Really need to spear it? cannot net it?
-
But how much kalk to put into the reactor then?
-
I broke mine off with bare hands... but must becareful... Originally 3 stalks, 2 died on me.. broke 2 off left one... then now it's splitting into 2 liao...
-
Heh... as I said, doesn't matter...
-
So how should one regulate a kalk reactor in tune with evaporative top up from a tubby?
-
No.. I doubt it woud tahan MH...
-
20 sing only??? Chiong one ah?
-
Er... I don't think so... Taken off dictionary.com.. ----- la·tent ( P ) Pronunciation Key (ltnt) adj. Present or potential but not evident or active: latent talent. ----- But doesn't matter lah... call it the "extra/built-up" heat...
-
Yah man it's not the same.. don't spend $20 bucks on a fixture only to have it blow your $100 MH bulb!!
-
Yah i have read about it... MHs are supposed to run at 100degC or so.. but my fan is directed the other way, so it's ###### out heat rather than blowing directly on it... It's not so much cooling the bulb, rather it's supposed to remove latent heat built up so that it's not transferred to the tank... Unlike stadium lights whose heat won't be going anywhere near anyone... Should be okay I guess... as for my ballast, I'm just going to leave it as it is... to be cooled normally...
-
How about the 2nd tier?
-
I presume this is 2 tier stand? So can have one area to put the sump? Are the tiers flat (i.e. has a piece of plywood rather than just a hole)
-
Depends on your cam... my cam's ISO 400 noise is not that bad... in fact I almost always use 400...
-
Already did bro... thanks for reminding me though
-
How about sit on the glass?
-
U mean yours is hung from the wall issit? I wanted some way to mount it without any physical alterations to the walls or ceiling... Any ideas? Oh BTW, how's the heat from this thing?
-
I have access to a bench drill (er.. those NOT hand held ones) so it's A LOT easier to drill multple holes... I drew a circle drilled a crapload of holes around its circumference, broke the thing off, then filed it down to smoothen it... I also added the lining to make it look cleaner.... To cut off the ballast area is DAMN DAMN difficult.. because: 1. Can't get a clean cut 2. Can't get the metal box to straighten out 3. Can't get access to proper tools Besides, it's better to just keep it, the weight of the AC fan balances it off... also, might be able to use the space for something... eg. moonlight? Shop names and locations? Just go Sim Lim Tower top floor loh.. got so many shops to choose from... can get almost everything there.. Of course the light fixture is from Viclite (see my other MH post), bulb from Edmund...
-
Go see my post in the DIY forum about where to get MH stuff... There's a link further down that will bring you to a website that is currently clearing stock of 250W MH fixtures, with everything inside less bulb and power cord... Total with a 10k BLV 250W MH will set u back by about $190-$200 bucks... I think that's about as cheap as it can get without too much DIY...
-
I don't use tripod leh.. just steady hands... and ISO 400... Using a Fuji S602Z...
-
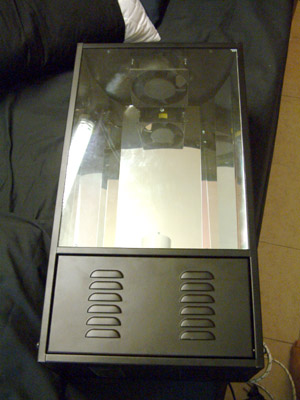
Well that's it.. hope you guys like what you see... Anyway I've spent a little under $200 bucks for the whole thing, so I think it's a pretty good deal... but I've still yet to figure out how to mount it!! HHahaa... will decide when I get the tank... As for wiring, everything is already done up when you get the fixture from Viclite, all one needs to do is to locate the live and neutral leads and extend them with the cloth insulated wire.. Also, I've earthed BOTH the external control box as well as the light housing itself... very important, don't want to get killed doing up a tank! A little bit of planning and more importantly a proper drill and anyone can do this! Oh... and the best part is... although the casing is now very much lighter, it still is a little heavy but at least the weight is now evened out as the AC fan balances it out.. as compared to previously when the weight of the ballast was all on one side of the fixture... Okay that's all for now...
-
Now I attached on the AC fan to the inside of the casing.. outside would be fine as well but I figured it would look better inside... besides, there's plenty of space even with the bulb.... Here's a view of everything...
-
Here's the control box with cover, note that there are vent holes (err.. picture too dark to see) at the sides.. quite important considering how hot it'll get... Also note that I've used cloth insulated wires... heard from the net that these are better because of the high current being pumped through the wires, don't want anything to melt would we!
-
Here we see the inards of the external control box.. everything is screwed down so there won't be any movement within the box...
-
Okay forgot to mention that I also went to mark out the areas on the base of the metal box that I needed to drill to attach the control gear... Here's a look at the box with the holes and stuff.... also note that the box came with small "legs" to keep it off the ground... good stuff..


