-
Posts
1,092 -
Joined
-
Last visited
-
Days Won
6
Content Type
Profiles
Forums
Gallery
Everything posted by kaykay
-
Lol I was just trying to say well done for generating 53 replies even before we get to see any rectangular box - the fish tank. Just a smart Alec remark, don't take it too seriously k.
-
Well done Bell. 3 pages and 53 posts, even before any sign of the rectangular box we call an aquarium. Lol..
-
Does it mean that as long as I get an adapter rated at 0.7A output, I can drive 5x3w LEDs in series? I'm thinking of drilling holes so that the wiring can be hidden in the box.
-
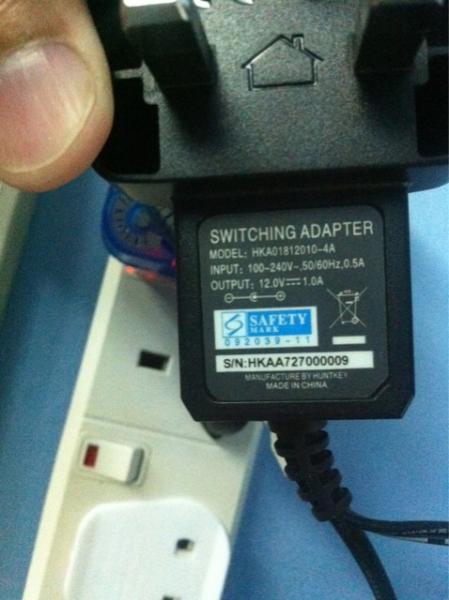
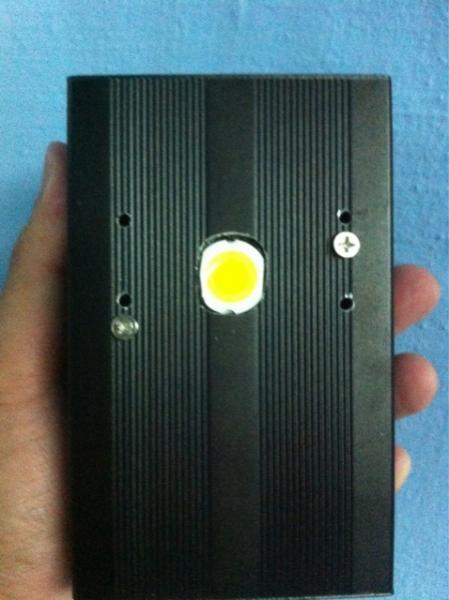
Hi bros, I'm now using a 10w warm white LED chip for my internal ATS. This chip is custom fabricated in an aluminum box, with a DC connector powered by this power supply. The box is like this. I'm not getting good algae growth with this. Worse, the focal point seems too strong for anything to grow in the 3cm diameter zone. I will be getting my hands on 4pcs of 3w 660nm red and 1pc of 3w 455nm blue LEDs. But I'm totally new to the schematics of LED circuitry. I'm intending to recycle the box and (hopefully) the parts within. 1. Can this power supply above be able to drive the 15w LEDs in total? 2. Do I need new drivers if using the above power supply? 3. Drilling the holes for the 4 new chips should not be too difficult. However, do I need an acrylic sheet to protect the chips? Note I won't be using lenses, as I want a wide spread. Will the acrylic burn or turn brown from the LEDs? 4. Can anyone help me with the soldering? If any bro is keen, I can bring down this box and we can tear this box apart to ascertain if I need to source for addition parts to make it work. I'll only get the chips sometime next week. So I'll have time to source for parts. Thanks.
-
I tried inserting a pc of filter floss at the outlet, but it wrecked havoc with the water level in the skimmer. I guess you can only just cordon the general surrounding area of the outflow with the sponge to absorb the microbubbles.
-
You're most welcome. It's a pleasure to be of help.
-
The water level outside is about at the level of the red disc just above the skimmer pump.
-

Kaykay's DIY-approach nano setup. 2'x1.5'x1.5'.
kaykay replied to kaykay's topic in Members Tank & Specs
Wah you really live up to your nick.. Hahaha.. Sounds interesting though.. You planning to do heavy feeding as to warrant the extra dimensions? Don't forget, I'm doing a reflective white backing to double the scrubbing effects already. Interested to know more about your lighting for this ATS too. Mine seems too strong in a single focus point. -
Thanks Mr Scientist. Haha I think we off topic too much le. We take it offline ya. Back to the "dream tank".. I think black sand is quite interesting, brings out the colors of the LPS and soft corals at the bottom. Detritus build up is less obvious too, but it should not be an excuse not to siphon the dirt on the sand bed during maintenance ya. Lol..
-
My water level in the skimmer reaches the red ring. The white dot is between 3 to 4.
-
Mind sharing more of this VHB tape? Does it work on painted house walls? I need to mount a 3-way timer plug when my lights are here.
-

Kaykay's DIY-approach nano setup. 2'x1.5'x1.5'.
kaykay replied to kaykay's topic in Members Tank & Specs
Haha.. I'm flattered.. Let me work out the sums. Let you know tomorrow. -
Hi bro, no I don't mind a single bit. On the contrary, I'm flattered. Some suggestions. 1. Micro bubbles from skimmer. Raise the skimmer higher, maybe by 6-8cm. Use something to prop it up. It'll help remove most of the microbubbles. 2. Don't get too anxious of the cycle. Time will take care of the major part. Our part is to have patience. I dosed Brightwell Microbacter7 to boost bacteria during this time too. 3. I tried to introduce all of the live rocks at the same time so that the die offs all occur at around the same time. I reckoned that I do not want to disturb the bacteria cycle too much in such a small water volume. 4. I used 12kgs of live rocks. Maybe 10kg would be better as I find my tank a little too cluttered now. 5. Maybe a small pc of black acrylic to cover the sight of the filter media and the skimmer will make the tank visually more appealing? Otherwise more rocks will also do. My 2 cents.
-
Different multi plugs may require different ways of mounting it on the wall. If you have not already bought one, look for those where you can directly place a screw from the front to fasten it to the wall. For those that you cannot directly screw on, you'll need to make markings and mount the screws first, then "hang" it using the mounted screws. Of course the first method is simpler and has a bigger margin for errors. Hope this helps.
-
Wow, amazing.. Simply beautiful..
-
Hi Bell, Welcome to SRC. Nice tank you have there. I'm running quite a similar setup as yours, and I would like to offer some humble opinions. 1. A 4" ios is kinda narrow to work with. The equipment you choose will hence, be limited by this dimensions. This will also mean that it may be slightly more difficult to "spec-up" your equipment ( as higher rated products usually are built bigger). For instance, I'm using a BM NAC3+ skimmer (rated for 3 times my tank volume), and it fits with barely half an inch of space around it. My ios is 5.5" wide. One way to get round it is, of course, use hang-on type equipment. But I'm a perpetual worrier of saltwater leakage, so I only source in-sump equipment. 2. Chiller placement. We've already read much reviews on the chiller choice in this thread, so I'll skip that. However, I think that placing the chiller in the lower shelf requires the pump to drive the water 1450mm down and up again. The pump will have to cater for this head loss. Do take note. (The 1450mm is from the tank rim to the chiller, as I don't see any drilled holes in the picture) 3. I'm running the tank with a fan 24/7. My temperature ranges from 27.8deg to 29.9deg. If you are not keeping SPS you may consider chiller-less. Evaporation rates are pretty high though. Around 1.5 - 2L per day. 4. It's really a good idea to keep your cables in the cabinet. But you have to take note of one very important point. *Make sure the cables do not run straight into the power point. You have to loop it upwards. You don't want water to drip downwards into the socket via the cables and trip the mains, or worse, get electrocuted while doing maintenance. An easy way is to mount the extension multiple cord on a vertical wall inside the cabinet. In this way, your cables can loop upwards, without giving the water a chance to seep into the sockets. Above are my 2 cents, in a kinda lor-sor manner. Looking forward to your updates ya. Enjoy this reeling journey!
-

Kaykay's DIY-approach nano setup. 2'x1.5'x1.5'.
kaykay replied to kaykay's topic in Members Tank & Specs
Nope, I didn't make extra. Am afraid you'll have to fabricate it to your dimensions. BTW is there a market for such ATS trays? Maybe I can make some hobby dollars (if it's permissible) out of this DIY hobby ya.. Haha.. -

Kaykay's DIY-approach nano setup. 2'x1.5'x1.5'.
kaykay replied to kaykay's topic in Members Tank & Specs
Hi Jeff, 1. DAMA can drill the holes. However, it'll cost a lot more. They may reject small projects too. 2. I used a normal electric drill. 6mm holes. GO SLOW. 3. Bigger bubbles are better. The wooden air stone produces too fine bubbles. And chokes easily. 4. I bought a $2 rough sanding disc from Daiso. Basically anything rough and sharp can do the job. Cheers -
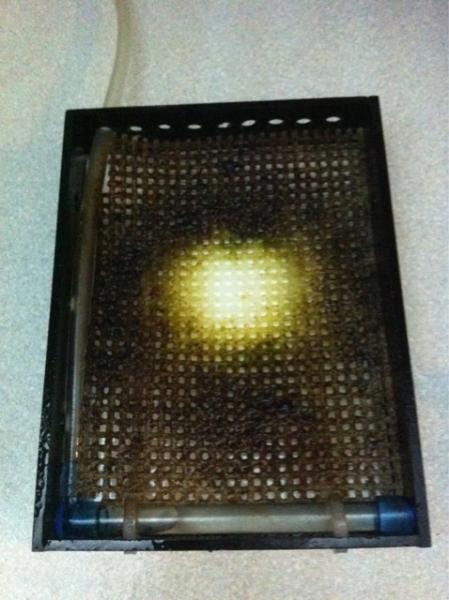
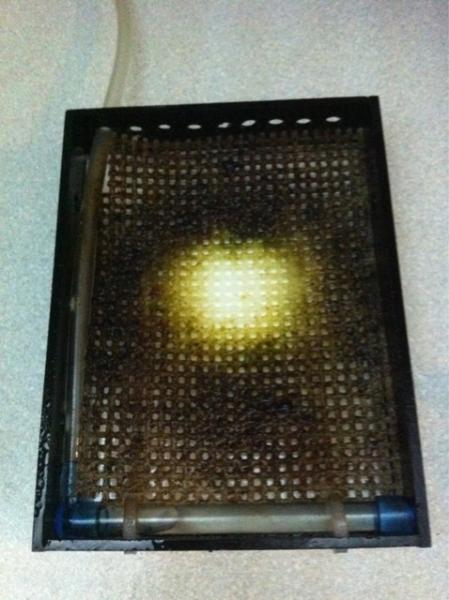
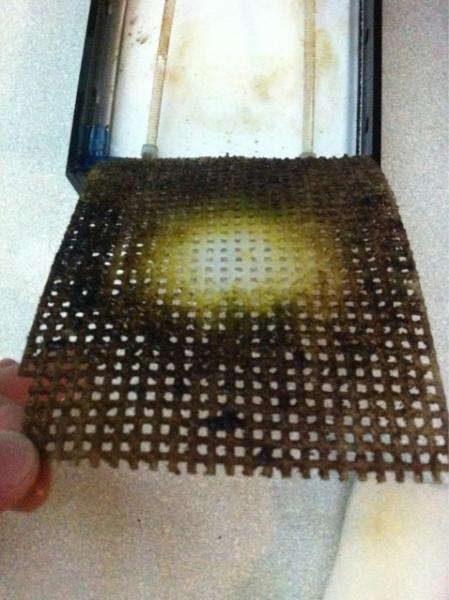
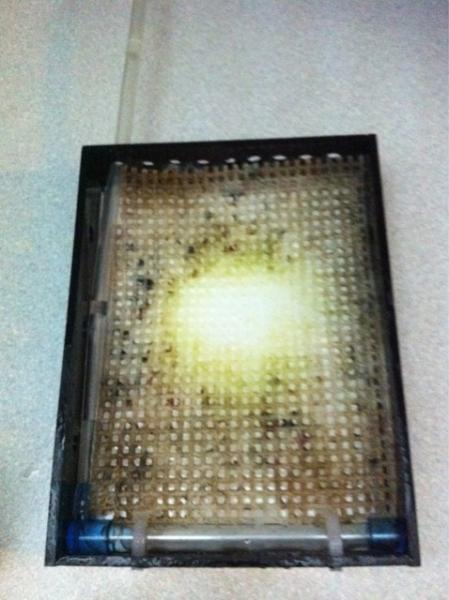
Day 27. This is the 5th day the mesh is placed in the self made acrylic housing. Took it out for a cleaning. Here's the before. With the white backing piece reflecting the light, the reverse algae growth is also quite encouraging, considering its only 5 days. After washing. Feeding is still very minimal, with just a flame goby and a tailspot blenny in the tank now. Is this why I'm still seeing dark brown?
-
Hey bro, just wondering how the harvesting will be done? We get the loose rubble as well?
-

Kaykay's DIY-approach nano setup. 2'x1.5'x1.5'.
kaykay replied to kaykay's topic in Members Tank & Specs
I don't think so. I feel that Singapore has a more vibrant marine market than our northern Neighbour, correct me if I'm wrong. -

Kaykay's DIY-approach nano setup. 2'x1.5'x1.5'.
kaykay replied to kaykay's topic in Members Tank & Specs
Sure, no probs bro. But please don't say take notes lah. Mine is really a very humble setup. Anyway we're meeting next week when you're collecting the lights. Going for a short driving trip up north this weekend. So probably will not be doing wc this weekend. Hope the nutrients don't build up too much. Therefore will not be adding any livestock till end of next week. The trick of not giving in to temptation is this-- don't visit any LFS!! Especially so when my office is just 500 meters away from AM.. Haha.. -

Kaykay's DIY-approach nano setup. 2'x1.5'x1.5'.
kaykay replied to kaykay's topic in Members Tank & Specs
Thanks bro. -

Kaykay's DIY-approach nano setup. 2'x1.5'x1.5'.
kaykay replied to kaykay's topic in Members Tank & Specs
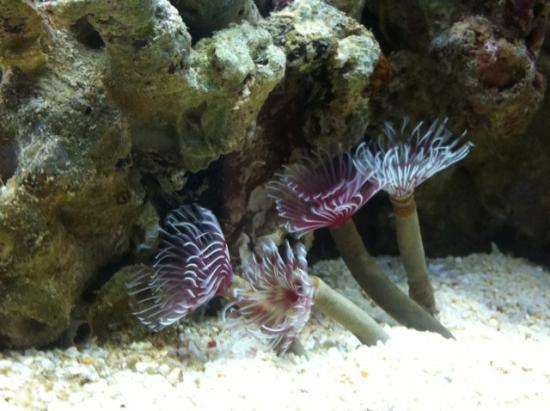
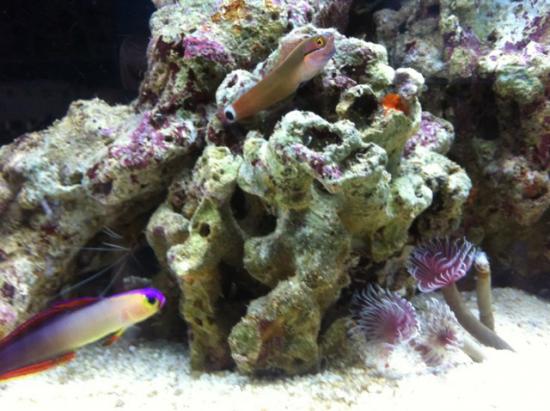
After rambling on for 3 big pages, I'm almost ready to show some livestock now. Total cycling time was 5 weeks. Done a 50% wc on week 4, and another 20% on week 5. Added some fishies over the weekend. Here's some humble shots, captured on iphone. Really love the Tailspot Blenny. That's all for this week. -
Hey bro, what's your evaporation rate like? I'm also thinking of using 2 fans. Now on 1 dymax w-8, I can only achieve min 27.8deg, but it can go as high as 29.9deg. I'm losing more than 1.5L of water a day.


