-
Posts
2,331 -
Joined
-
Last visited
-
Days Won
119
Content Type
Profiles
Forums
Gallery
Everything posted by SubzeroLT
-
Lol....surely its not just because of the post here. BTW, you can try contacting other places that may carry the Goldpods ( eg. Aquarium Artist or Fishy Business). For the Wild Goji, it'll probably work fine as a daily pellet but personally, I'm using it to supplement other meat/protein based diet.
-
The Nyos Goldpods shared earlier turned out to be quite good. My fishes love it. A fellow reefer even had success with it for his purple queen anthias (notorious finicky eaters). Decided to try one of their dry foods - Nyos Wild Goji Did some reading up - It uses genuine organic food source (organic production, pesticide free). Aside from the standard staple of omega 3,6 & fatty acids, it has 2 interesting ingredients - Aloe Vera & Goji. What's good for humans should probably be beneficial to fishes too.... Goji is the english name for Wolfberries - popular in Chinese food preparation. Its supposedly high in carotenes (Wiki : an orange or red plant pigment found in carrots and many other plant structures. It is a terpenoid hydrocarbon with several isomers, of which one ( beta-carotene ) is important in the diet as a precursor of vitamin A.). And carotenoids have been scientifically proven to improve coloration in fishes. I read some interesting reviews about the buoyancy. Some food like Ocean Nutrition Formula One just sinks to the bottom quickly. The Nyos Goji was not exactly a pellet but more of a 0.9mm - 1.5mm soft granule. They sinks somewhat much slower which is great for the slower fishes. It took several feedings before the fishes got used to the new food. But they are rushing for it now
-
I split the dose... i suppose that's alright. Just like when using Red Sea Coral colors (ABCD)
-
Currently dosing FM colors 3x weekly. Want to auto dose for simplicity.
-
I wanted to increase anaerobic bacteria population within the reactor. I ran it for some time without the siporax and managed to get a certain drip rate / ORP level. After adding siporax, i noticed able to get much higher drip rates & yet maintain 0ppm nitrate in the effluent.
-
Current plan is 1 return pump though i'll be having piping that caters for 2 pumps. Thanks for the tip...i recall that incident you had
-
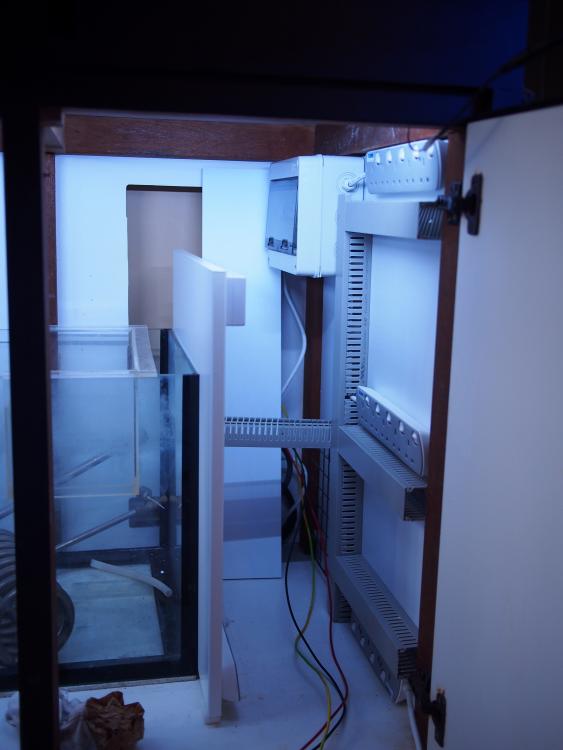
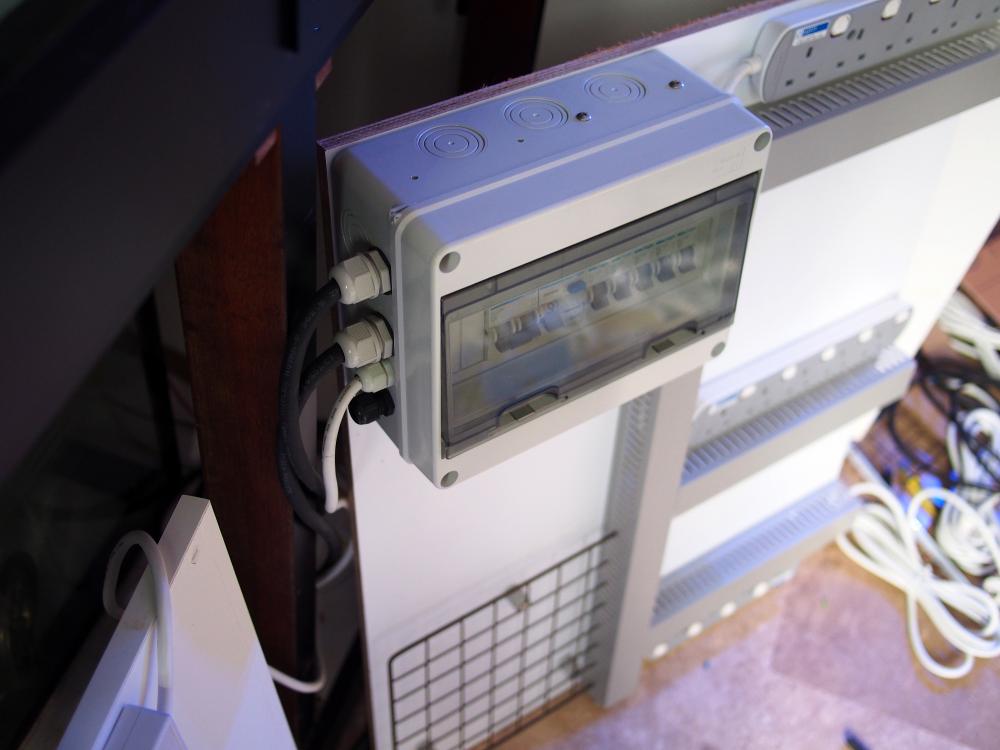
Electrical panels done. The breaker has a MCB for over current, RCD for earth leakage and individual breakers for each extension plug. From past experience, when something trips, the entire socket trips in the home's main circuit breaker. Hence for this setup (hopefully it works), the idea is such that if one extension chord trips (eg. pump), it does not affect the other extension chords (eg. wavemaker)
-
Going overseas for a while, so I set up the dosing pump again. Got some of these really nice tubes for dosing pumps recently from Madpetz. The colored tubes are great for identification / differentiation. Other updates for the tank. Replaced the skimz recirculating reactor with a proper sulfur reactor since my new tank is delayed.
-
Thanks
-
Very nice! Looking forward to more updates.
-
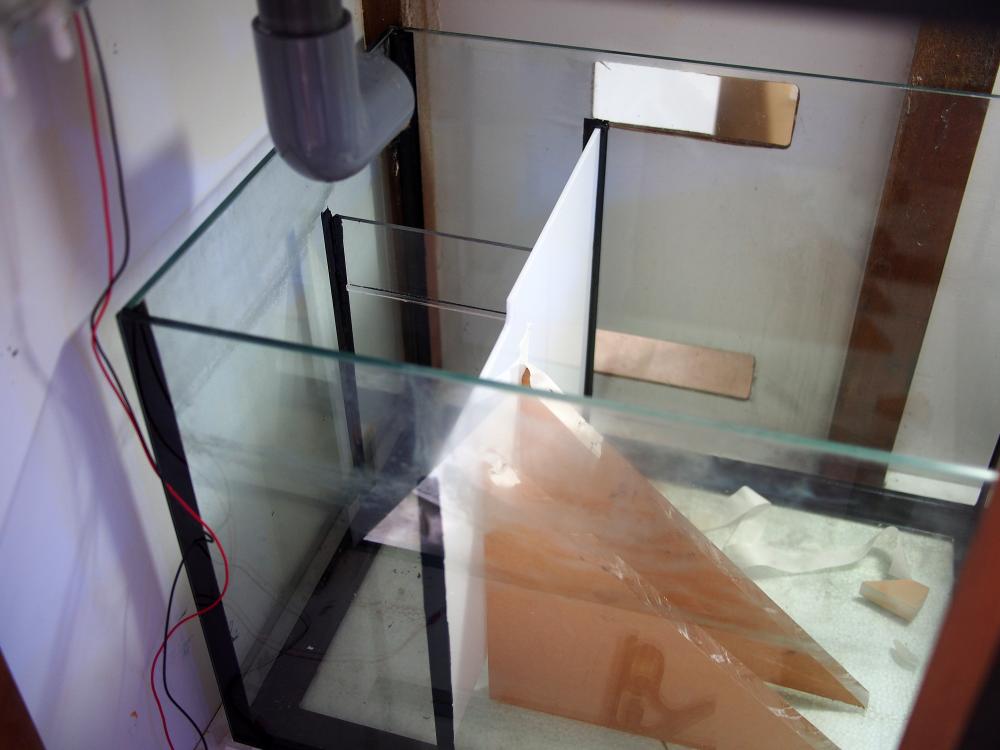
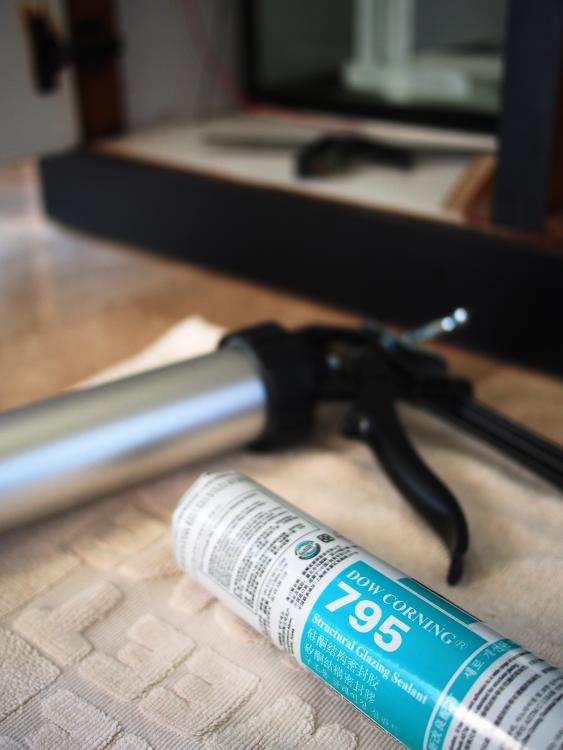
After closer inspection, some scratches were still noticeable on the tank. And more obvious when lights are on. So change of plans - to get a new tank instead. The current tank has been reserved by a bro who will re purpose it as a terrarium. I'm damn keen to see when that's done up. Other updates The original sump was quite simple (left & right compartment). Inspired after seeing some nice sump designs done by Iwarna & another from LCF425's tank, it would be nice to add some compartments in the sump for filter wool, bubble trap etc. Glass is hard to work with. Acrylic is easier for DIY but bonding acrylic to glass may be an issue. Did some checking up & found that using a structural adhesive to bond glass-acrylic is possible. Dow Corning 795 is a RTV (Room Temperature Vulcanization) structural adhesive & does not use acetate accelerators (i.e. does not smell of vinegar). Because it cures 'naturally', it takes 2 weeks to fully cure. A check with the distributor showed this is supposed to be one grade higher than regular sealants. Pic of the additional panels inserted. They hold up very well.
-
Very nice indeed!!
-
A good investment with the MP40 & battery. At least you get some peace of mind over power trips. It'll be good to find out the root cause of the issue. A melted plug is a sign of excessively high watt density over an area causing the connection to glow & cause the plastic to melt. Most likely due to - poorly joined wire - current leakage of a particular component - And coupled with quality of the extension plug / thickness of extension cable
-
BRS economical gate valve appears cheaper but with the shipping factored in, its not that economical after all. And thanks all for the comments. Still relatively new to the hobby. Still learning....
-
Really? Thanks for the good info. Sent from my iPhone using Tapatalk
-
No. These are frozen pods & will NOT work as 'starting culture'. To get live copopds, best to get some chaeto from fellow reefers or from LFS tanks. For example, Iwarna sells macro algae for ~ $5 a handful. Loaded with pods.
-
Most of my piping stuff are from Hai Cheong Plastic (Located at 11 Kallang Place). Alternatively, you can get a good selection at Madpetz or good neighbourhood hardware shops.
-
You can get it at Madpetz, Aquarium Artist or online shop ReefMarketSG. Sent from my iPhone using Tapatalk
-
That's a Spears gate valve. 1" slip fitment. Yes, I got Hai Cheong to order for me but they applied a very high mark up Nevermind...just 1 piece. The dark gray pipe is some leftover schedule 80 1.5" pipe i had left from my previous tank project. Hence, everything upstream is upsized to minimize losses. Schedule 80 is absolutely unnecessary for our tanks. It was a newbie error made the last time.
-
Tank progress quite slow. I will make it to your place one of these days.
-
The gate valve is quite heavy & not located directly underneath the bulkhead. I was worried it'll compress the gasket unevenly over time. Hence the pipes were secured with a scrap piece of aluminum profile
-
Someone commented separately that the tank looked so new. In actual fact, this was what it was like initially when tank was moved on 7th July
-
Its a 2nd hand tank lei.
-
Original plumbing was the 'traditional' overflow with one drain & 1 return. These type of plumbing is known to be noisy. Hence it was converted into a Herbie overflow instead. Noticed that the original fittings used had a potential issue. Only 1-2 threads were engaged when this was fit through the bottom of the tank. High risk of loosening -> risks of leaks. This was a 3/4" pipe and I could not find fittings with longer threads. Got a external threaded pipe & made a bulkhead with longer threads. Cut out a gasket from a sheet of EPDM rubber. To be used between the bulkhead & glass (instead of using silicon sealant) Drainage piping done
-
Did the usual process of cleaning the rocks Bleach, soak, scrub the rocks for a day or so : Then rinse with tap water / anti chlorine a couple of time. Having a large open bucket like this 120L one from ikea is great Having some water movement should improve the efficiency to remove the bleach. Soaked the rocks in tap water for a few days. Let the rocks dry, then vinegar soak for 15min.


.thumb.jpg.57c2e34da3fe90fcdb8e11c6a93f46a9.jpg)
.thumb.jpg.89f198909c3690da819915e88d81e22f.jpg)


.thumb.jpg.21c7da555efb0bebad094b5c92c51160.jpg)
.thumb.jpg.7f4caea8489aabc445a36ba53bf83a87.jpg)
.thumb.jpg.050f50a77609afd13977773a54b86ecb.jpg)
.thumb.jpg.e9757ed0a5e1f27559b7c6e2fd8b4931.jpg)
.thumb.jpg.eb6a401d8e737ec0b31e371ba0772a87.jpg)
.thumb.jpg.a09c1cb095975673b04af95645986850.jpg)
.thumb.jpg.e532833e255ab9fbfccfa10a92645253.jpg)
.thumb.jpg.303a25db4ff1e13ed9051a130f9736dd.jpg)
.thumb.jpg.3029407742924b21e1cf398ce85aa502.jpg)
.thumb.jpg.1f074b2f188bee352355e669de83c456.jpg)
.thumb.jpg.1e0a41ea4862a2626e8acb6ace9e3de9.jpg)
.thumb.jpg.9df74b47ba47a1c128eec6d8616552bc.jpg)
.thumb.jpg.560701bfa14ad255baf90ae36029afa4.jpg)
.thumb.jpg.2ac8e218a5f2254218084ebed6aeee8b.jpg)